MKL’s 1973 R75/5 LWB Toaster Restoration Project Archives
Background: After years of lusting after these old workhorses, I finally got serious and decided to buy one for myself as a present for getting halfway through grad school. My idea is to take the old beast apart, and lovingly rebuild it to new condition. The purpose of this site is to document my progress as the rebuild takes place.
Inspirations For the Build
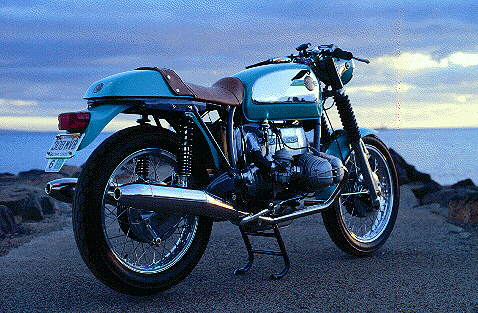
There are three main inspirations I am using for this build, all Toasters in various forms from stock to radical cafe. Pictures can be found here:
Progress
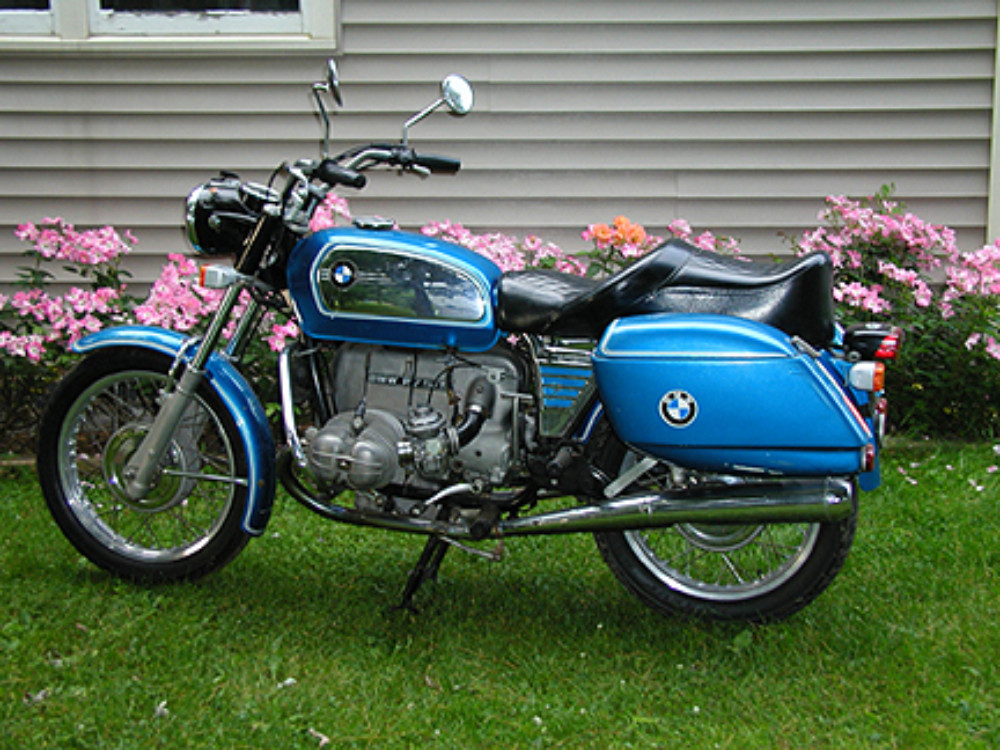
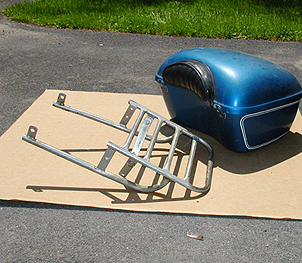
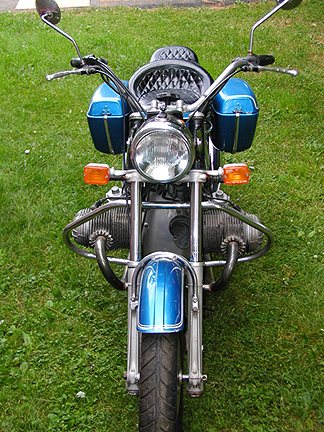
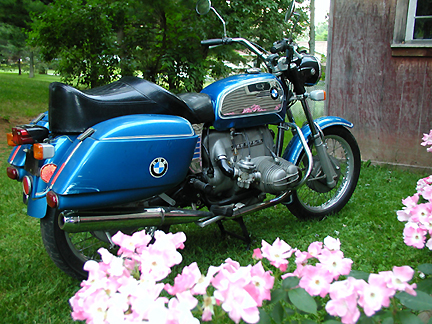
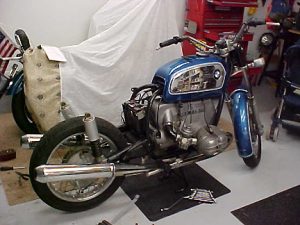
Here it is, step by step: The bike was picked up 7-26-03 with 9,623 miles on the odometer. After 30 years in use, it’s impossible to say for certain that this is the total original mileage, but given the very good condition of the bike as I bought it, it just may be the case. I immediately removed the Wixom saddlebags and the engine guard, drove the bike around for a few miles, and noted that it ran just fine. On 7-30-03, I replaced all fluids, the oil filter (BMW OEM), the air filter (BMW OEM), and drove it around for a few hundred more miles. I began teardown on 8-4-03.
Removal of Rear Subframe and Fender: I abandoned my plans to begin taking the /5 apart in September, and got a head start. The way I see it, everything that could go smoothly probably won’t, and I really want this thing to be ready next spring.
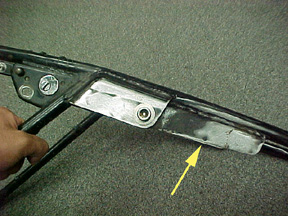
I removed the subframe without a hitch, and brought it to work (we have a machine shop in our building). There, I had all of the extra holes which were drilled into the subframe tabs over the years (mostly to mount the Wixom saddlebags, but some other sloppy holes were there for no apparent reason) filled by the welder. I then took to the subframe itself, and straightened the tabs to closely match the lines of the tubing. Finally, I sanded all of the filled holes and other slop off of the subframe, so that all the metal is now nice and smooth. Here are some pictures of the right and left sides of the subframe taken after the work was completed. It should look nice once it’s painted! A trip to the hardware store was in order, and I now have a complete set of stainless steel hardware (non-metric knurled allens all around, for a more tasteful look) to re-mount everything.
I visited the local dealer to ask about the pins for the seat hinges. I managed to buy some pins (block pins for a later model, apparently) to weld onto the subframe – problem is, the dealer had no seats, so I have no way to accurately place the pins for the welding. Thus, my next step is to buy a seat, so I can place the pins and be done with the subframe section of the bike. I bought some hinges as well, for the new seat.
While I’m at it, this may be a good time to look into a whole new subframe lockset, since I don’t have a key to this old one – but I really don’t care too much about the lockset, and may just live with the existing one. Given the prices of some of this stuff, I don’t want to go nuts on stuff that I don’t care about. The lousy pin for the seat hinge cost $9!
Removal of Fuel Tank, Front Fender, Bing Carbs, and Exhaust System: The sheetmetal is all off now. The fuel tank’s petcocks were full of red speckles, which I assume is the old inner-lining, and should be redone. One of the petcocks was missing a filter grid. The front fender came off without any problem. The exhaust system also came off without any problem – I just dabbed a small amount of penetrating oil near the finned header nuts, and off they came without much effort. However, the right head’s exhaust threads are looking pretty sad. I will check with the dealer if they are bad enough to warrant repair – likely not, but they’re showing their wear. The carbs came off also, again with no problem. I checked the jets per Clymer and everything matches stock numbers. I did not mess with any adjustment screws, and don’t plan to at this time.
I now have the frame, motor, final drive / swingarm & rear wheel, front end, and headlight assembly. The associated wiring is still there as well. Here are some issues, from rear to front…
1) Part of my restoration idea is to repaint the frame, though this time the same color as the sheetmetal. The fd / swingarm takes a lot of abuse and gets dirty fast, and I was thinking about chroming it as I saw on a site I discovered http://www.postaldave.com/restore/cleaning.html I contacted Dave this morning to ask if chroming presented any issues (especially with the mating surfaces).
2) Taking the motor out of the frame looks to be tight clearance. I guess I need to remove the plastic air intake thing on top of the block to gain more space, and then just wiggle it out somehow. The Clymer manual makes it sound like a 2 man job, and mentions removing the jugs / head /valve covers, which I would rather not do. I wonder if one can remove it without taking it apart…
3) I did the “sticktion” tests on the front end as per Duane’s site, but am still of the opinion that the front end needs a rebuild. The seals are very old. I also want to remove the turn signals, but their brackets seem to serve a purpose near the tree. I will have to look into this further – haven’t studied the front end yet.
4) Headlight assembly has all sorts of massive cabling going into it. I’m afraid of what I will find inside, as I am extremely bad at anything which involves electrical work. Nevertheless, it needs to be taken apart, if only for the speedo / tach rebuild.
Finally, we have the seat issue. I was devastated to find out that Corbin does not make the Gunfighter for the LWB model, so I searched and found an alternative (same $300 price) at Eurotech, except the Eurotech model was vinyl instead of leather, and plastic basepan instead of metal. I also discovered that Sargent can use my existing horrible pillow two-up (with a metal pan, though) and make me a custom Gunfighter style seat, with leather and my colors of choice, for about $300. Hmmmm….. Also of note on the seat issue is that Duane’s /6 seat mod shows a subframe which is different from mine – I have a thin bar going across where Duane shows a much broader bar – his mod would be much tougher to do on my subframe, but I’ll look into it further.
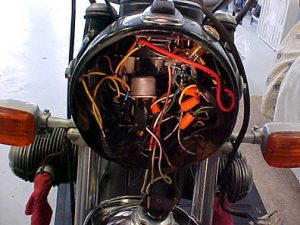
Removal of Headlight Shell, Instrument Cluster, Handlebars and Controls, and Rear Wheel: I started off innocently enough, taking the headlight shell apart per the Clymer manual. My goal was to get the instrument cluster out so I could ship it off for a rebuild. Having only seen the inside of my Sportster’s shell (with wires only for its H4 bulb,) I was in for quite a shock. Here’s what I found inside the R’s shell–
Horror movie buffs may remember the ear-piercing scream Jamie Lee Curtis became famous for in “Halloween.” That was NOTHING compared to my own scream when I saw this mess. You see, I fear three things in life: Heights, math, and electrical wiring. This son of an electrical engineer can barely remember Ohm’s Law, and there is just no way I’m going to make heads or tales out of this. Things went from bad to worse as I removed the speedo / tach cluster, and several of the attached wires and lights pulled out accidentally before I could mark where they went. There is simply no way I’m going to be able to solve this mess myself, given my electrical abilities….
The bottom of the shell is rusty and needs reconditioning. Once done removing the speedometer / tach, I proceeded to loosen the shell, and removed the handlebars and related controls. I could not figure out how to remove the speedo cable from the engine side (no mention I could find in Clymer,) and I left the tach cable connected to the engine too. The handlebars are almost ape-hangers, and are definite throw-aways. The controls are original and very old looking. I need to figure out how to recondition them. All wiring from the controls to the headlight shell is still intact. The clamps which hold the handlebars are beautiful! I can’t wait to polish them up!
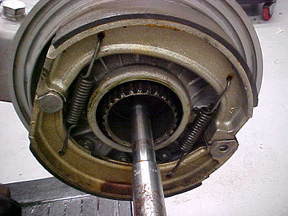
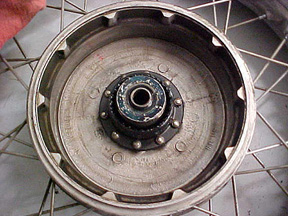
The rear wheel was next. I put my stand under the oil pan with a piece of wood for support, per the Clymer. Everything went smoothly until it was time to actually pull the wheel from between the left of the swingarm and the final drive / brake unit on the right. The Dunlop tire has a big lip around the outside and just wouldn’t slide through, even after I deflated it. I got frustrated, tied the bike’s frame to the stand, and began furiously pulling on the tire while raising the swingarm up, and eventually got it out. Sometimes brute force is the answer, I guess. I was happy to see that the brake assembly and drive splines look very clean. Here are some pics:
The axle is slightly pitted, and I will polish that out before reassembly. I have the wheel into work today, so I can take it to the local dealer for inspection. It needs to be re-spoked and polished, of course, but I need professional advice as to the splines and condition.
Other minor things: I polished the footpeg brackets with a wire wheel, so they’re nice and clean again. Today, I’m going to do the same for the rear brake lever assembly, which is filthy. We’re down to the motor and the front end! I’m going to do my best to keep the whole wiring harness intact and well marked.
Update from 8-6-03: I took the rear wheel in to AMOL Motorcycles in Dumont, NJ (one of the oldest BMW dealers in the country) so the drive coupling splines and brakes could be inspected. I’m very happy to report that the mechanics were completely convinced that the bike indeed likely has extremely low mileage (they agreed with the ~9,800 on the odo) given the superb condition of the splines. Likewise, the brake area is clean and original, and everything is well lubed. Great!
Now for the bad news. The spokes are rusty, and the wheel looks out-of-round. The mechs recommended an all-new wheel, to be re-spoked with stainless. I found out I have an oversize tire on the wheel also, which explains the trouble I had pulling the damn thing out. I have a “Weinmann” wheel which is in admittedly rough shape (someone had taken a ball-peen hammer to it in one spot,) and will explore my options (fixing this wheel, buying a used one, or buying a new one).
8-7-03: Removal of Final Drive, Front Wheel, Left Fork, and Wiring Harness: I had planned to remove the whole swingarm, but did not have the required 27mm socket. So, I settled for the final drive, which came off easy as pie. The splines look great! See pics below:
The front wheel was removed without a hitch. Everything inside looked nice and clean. Next came the forks, which were a much bigger problem. The Clymer was extremely vague on this procedure, but it was fairly obvious what to do, so I got to work on the left fork. It was easy enough to remove, albeit with some elbow grease and a few taps with the rubber mallet required. The fork oil inside the right tube was a mucky light brown – clearly very old. When I moved on to the right fork, I discovered that the top bolt which holds the whole fork in place was stuck, and spinning it would merely turn the whole fork assembly. No matter how tight I held the fork while trying to spin the bolt, I couldn’t break it loose. I didn’t want to use anything abrasive to hold the smooth fork leg while trying to break the bolt loose, so I tried wooden clamps and a whole assortment of other tricks, to no avail. I will seek some professional advice from my local indy about this tonight. The end result was the left fork off and ready for rebuild, and the right one is still stuck there as shown above. All of the rubber seals were in pretty sad condition in any place they were exposed to the outside elements, but still nice and lubed inside. No seals were broken. They will all be replaced anyway.
Frustrated and running out of time for the night, I settled for finally removing the whole wiring harness, intact. I made whatever notes and marking I could, and dragged the whole sorry mess into the corner of the garage, where it now resides sprawled out like the entrails of some slain beast.
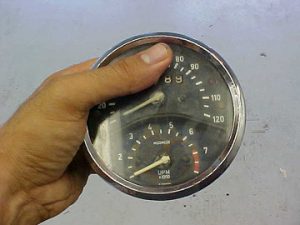
Other minor things: Yesterday, I sent my speedo / tach cluster out to Overseas Speedometer for a rebuild, which is likely to run $175 and take 4 weeks or so. I polished the handlebar risers with a wire wheel, and they look great now. I had the machine shop next door fabricate some new stainless steel brackets for the battery tray (the old ones were disintegrated,) and got some more miscellaneous stainless steel hardware for the rebuild. I also came home to discover that my BMW-MOA membership is now active (I joined the day I bought the R75/5,) and I can’t wait to start reading that Member magazine which has been so highly recommended to me.
I also played with the various engine covers, and I removed the starter cover to reveal a very dirty Bosch starter mechanism. I will clean that up, remove the air cleaner cover, and see how much clearance I have then to remove the motor from the frame. I also need to figure out the best way to restore the aluminum of the engine. I have access to chemicals and a bead blaster, and am busy researching what is best (so many opinions!). Tonight, if I have time, I will attack the right fork leg and the swingarm assembly.
Final Note: I am really having second thoughts on the cafe idea now. The more I think about it, the less radical my idea becomes. I may settle for a simple S-Fairing and gunfighter-style seat, and leave the rest stock (except for the barrage of reflectors which I will remove). I may even abandon my idea of a monchrome paint treatment between the frame and the sheetmetal, and keep the frame black. We’ll see……
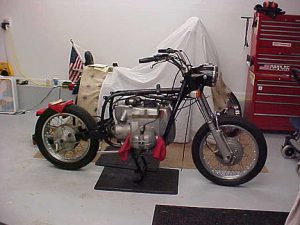
8-8-03 – 8-10-03: Final Teardown: Friday 8-8-03, I went home armed with suggestions on the right fork removal, and sure enough, the pinch bolt wasn’t tightened to spec. Once I got it snug, the right fork retaining nut was easily removed, and the fork popped out – funny how overlooking the obvious can drive you insane. The fork oil inside was even worse than the sludge in the left fork – it must be several years old. The swingarm was next – AMOL had advised me that a standard socket wouldn’t fit in the swingarm’s hole for the 27mm nut, so I ground my socket wall down to 35mm total diameter on Friday afternoon in preparation – thankfully, everything went smoothly as a result. The driveshaft presented no problems other than a tight fit for my Craftsman 10mm wrench. A few seconds on the grinder, and the wrench fit like a charm. The centerstand and kickstand also came off easily, and at that point I called it a night, left with only the trees and engine still mounted to the naked frame. I took Saturday off from the project.
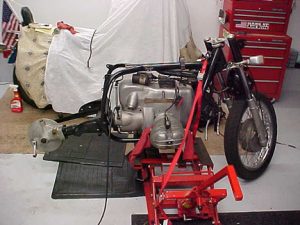
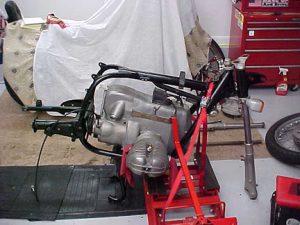
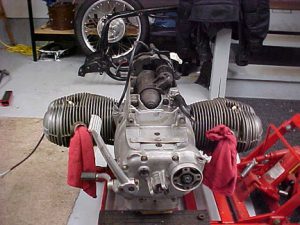
On Sunday, my friend (who owns the local Harley-Davidson repair shop) stopped by, and together we positioned the frame center on the lift, unbolted the motor, and wriggled it out of the frame as shown above. The trees came out easily also, at which point we discovered that the bearings are totally shot – there was virtually no lube in there at all, though the interior of the frame neck is still perfectly smooth. We were done in less than 10 minutes. It’s amazing how simple this bike is, and how certain pieces are over-engineered to the hilt – and the motor, to me, is a sculpture! Look at the shape of that thing – sexy as hell! I can’t wait to clean it…
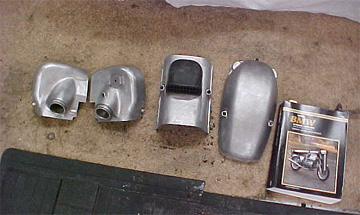
What’s Next? Right now, both forks are in process of being professionally rebuilt at AMOL. New Progressive springs will be utilized in place of the stockers (I read in the archives about their firmness, which I’m used to from the Sportster). I also took some spare time on Sunday to polish up a few items – check out the engine covers below:
I found that the 30 years of accumulated dirt buildup on the engine was very thick in most spots, so I got to work with some good old fashioned elbow grease, some Scotchbrite, a few cleaners I had lying around, and for the really tough spots a Dremel tool and a wire wheel. I was careful not to get the parts to look *too* bright, and to only use methods which I could use on the rest of the block without having to go crazy with further disassembly. I’m sure at the end, with some patience and much more elbow grease, that the motor will look like new. I blasted the exhaust nuts and rear brake lever, and they look great now. When the assembled engine is fully cleaned, I will take the top end off for blasting as well so everything matches. In the process, I will have the top end checked for proper clearance and replace / repair anything that needs attention. The valve covers will be replaced outright with new ones, as these originals are scraped up.
At this point, with grad school about to start up again, the pace of the project will slow dramatically – my goal was to get it apart before school so I could get things rolling before then, and I’m right on track. Now, it’s all about choosing a color scheme, deciding on components, farming things out, and waiting for all the completed parts and subassemblies to return, at which point the reassembly will begin taking shape…
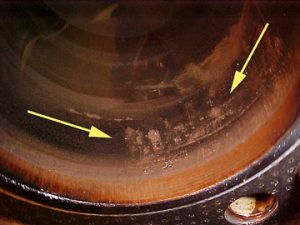
September Update: A few things have happened since August 10, when the original teardown was completed. The most significant finding is as shown in the picture above.
Top End Removal: With the R’s mill out of the frame, I lovingly degreased it, and polished it up with some aluminum cleaner and scotchbrite – it looks fantastic! I then proceeded to remove the top end for inspection. The left side came first, and I was thrilled to find a completely clean, virginal cylinder and piston. Unfortunately, the right side did not fare as well: As shown above, the right cylinder is etched, theoretically from condensation built up during a long term storage. To deal with this, and to keep the solution simple and cost-effective, I’m going to buy a set of weight-matched factory pistons in 0.5mm oversize, and bore the cylinders to match. While this is going on, the heads will be freshened up as well. The valve covers will be replaced outright, as they’re badly scraped. And everything will be blasted to match before being reinstalled.
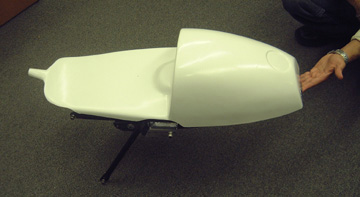
CafeRace Knoscher Replica Seat: My rear cafe seat came in, as shown below. At this point, I have not done anything with it. Obviously, I need to source a place to fabricate a seat to fit, in addition to finding a tail light fixture and a roundel emblem to fit. With a little trimming here and there, this piece should help to achieve the look I’m after. Finished examples can be seen here.
Other Misc Stuff: My rebuilt speedometer and tach arrived from Overseas Speedometer on 9/12/03. The bezel and needles were replaced – to be quite honest, I’m a little disappointed in the replacement needles. They look like cutoffs of a larger piece of plastic – but it’s not too noticeable unless you stare closely. I obviously cannot comment on speedo / tach operation and calibration until I get back on the road. In other news, my chrome Progressive 412 rear shocks arrived, as did my new rims and stainless spokes. All of these components are still sitting in boxes. I still need to order my clubman bars, sleek S-fairing, and new exhaust system, amongst other things.
The Vision Is Taking Shape: I’ve decided on “The Look” – As I see it, the frame will be a deep blood red, and the tank (and fenders, if any) will be a either a whitish or very light blue silver based metallic (likely a BMW automotive color, like Titanium Silver). The headlight bucket, ears, and other related parts will be painted to match, and there will be no pinstripes anywhere. I think this will be a tasteful, elegant solution which stays within character.
Grad school is in full swing, so progress will be slow but worthwhile – stay tuned!
The Project Resumes: It’s been over 5 years since this project was put on hold, and it’s good to be back. The restoration fell victim to life’s circumstances – a nasty divorce, finally getting my MBA from NYU, and most recently a second marriage. This bike in pieces, unfinished, is the last remaining reminder of a relatively difficult period, and it’s time now to pick up where we left off, and restore the old beast to its former glory.
The plan with my cafe jones now satisfied by my R100S, the R75/5 will be restored to a more conservative stock appearance. Color is undecided as of yet. This month, I have been busy gathering all of the old and new parts I originally sourced for this project into one place. After 5 years, some parts are MIA, but most are still where I stored them. Next, I’ve removed many of the aluminum components on the bike, and am sending them out for polishing.
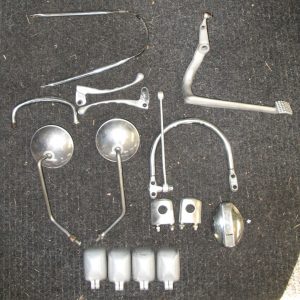
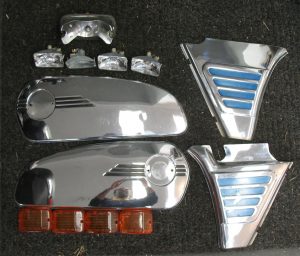
I sent the heads out to Mr. Randy Long for refurbishment. Buchanan has rebuilt the wheels with stainless spokes and new OEM rims, and Tom Cutter has renewed the bearings. Cutter also has the bored cylinders and new +0.05mm oversized pistons to match. I’ve lightly polished some of the chrome components – most came out very nicely with minimal effort. I cleaned up the turn signal lenses and housings as well.
To Do I’ve got to source a good painter, and I’ve got some leads. I’ve got to figure out what I have that’s useful, and what’s not. From there, it’s just a matter of coordination, time, and of course a second mortgage! Stay tuned!!
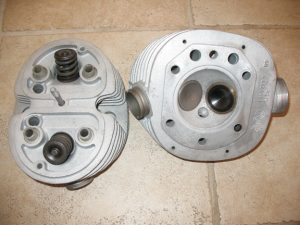
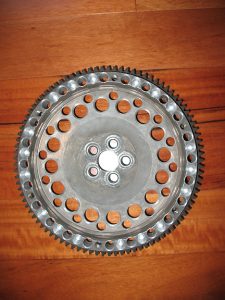
Steady Progress: With riding season here in full swing, the R75/5 Project is still getting its fair share of attention, along with all the other needy bikes in the stable. In the past 4 months, I’ve continued to organize all my parts, as well as send out others for refurbishment. Above, as you can see, the heads have been completely reworked by Randy Long in PA. The finished products are excellent, with new valves, unleaded seats, and repaired exhaust port and spark plug threads. Long also lightened and balanced the flywheel as shown below.
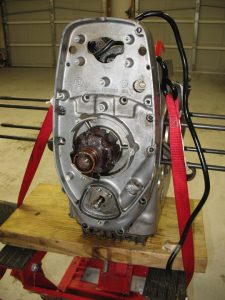
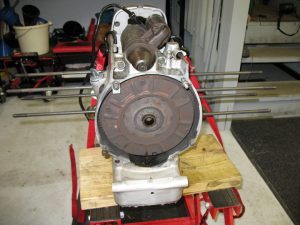
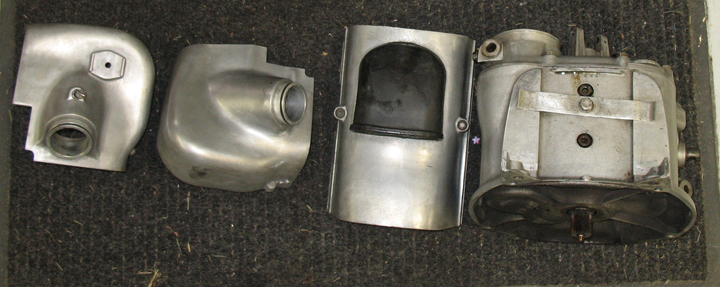
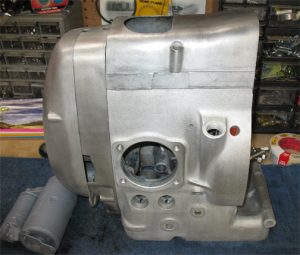
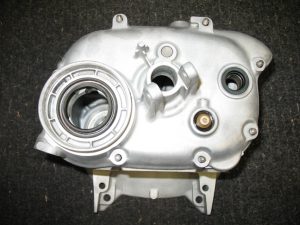
Engine Disassembly and Cleaning: I tore the engine down to the block, and cleaned and degreased all of the internal components. I then had the block and all of the other associated covers soda blasted and acid washed, and they look pretty good now. See below:
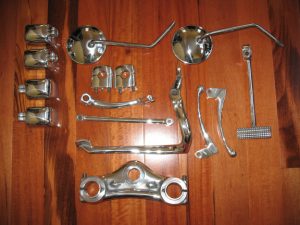
Polish & Chrome: This was a rather sordid tale of good and bad. The aluminum sent out for polishing came out great, as shown below. Unfortunately, the same vendor royally screwed up the chrome, which was returned with bubbles in it. Worse, he badly dented my toaster tank side panels, which are now back out for straightening prior to being re-chromed. So basically, everything sent out for chrome has to go back out again. Lesson learned – get chrome plating at a reputable chrome plating shop, because trying to save in this instance only winds up costing you more.
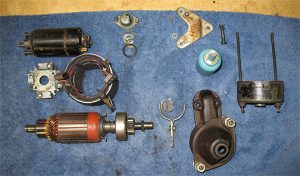
The Bosch Starter: I disassembled it and found everything in good working order, except for a worn bushing in the nose cone. I’ve primed it, and will paint it gloss black once I take care of the bushing.
What Else? My vacillations continued until finally I settled on a cafe theme, so we’re back to that, and staying there! The Knoscher-seat is at Gary Maucher’s, where he is building me a custom cafe seat. Ross Thompson in Canada has my gas tank for minor dent and blemish repair, and he’s taking care of the toaster side panels as well. Once all that returns, I will have everything I need to paint, and I’ve found a good local painter now. I’m leaning towards a red, similar to what Harley uses in its “Firefighter Edition” bikes. Stay tuned for updates!
