MKL’s ’98 1200C – How To Replace The CV Carb’s Top Cover (without ruining the delicate diaphragm)
Whether playing with the needle or swapping the stock black carb top for chrome, damaging the delicate rubber diaphragm underneath is a $35 mistake that can be avoided, if one takes the time required to do the job carefully. Here’s what I found works effectively – FYI this whole operation is performed with the carb cables still attached to save time, but the carb is pictured separately below for viewing clarity:
First step is to pop the carb off of the manifold – just rock it up and down
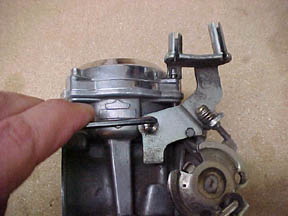
gently until it pops off. Do not force or pull anything hard. Then, loosen (DO NOT REMOVE) the bracket on the right side which guides the cables (see Figure 1 below).

Figure 1: Loosen this cable bracket, but do not remove it!
Now, you can loosen the four screws which hold the top cover in place, and GENTLY slide the top cover off. To put the cover back on after you’re done, the first step is to align the diaphragm as best you can around the grooved edge of the carb’s top. Take your time, and do not use any silicone or grease – none is necessary. Align the top cover as best you can over the carb and GENTLY lower it under the now loosened bracket and onto the diaphragm. Now the fun part! GENTLY (get the hint yet?) and very slowly move the top cover around in a large circular motion while keeping the carb body itself stationary (NO DOWNWARD PRESSURE!!!!) to seat the diaphragm. In this manner, it will seat itself perfectly – but you still need to check!

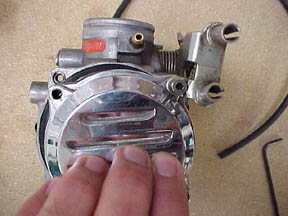
Figure 2: Peek along the edges, to make sure the diaphragm is seated in the groove
To do this, slightly shift the top cover away from each side once it’s settled, and peek underneath to make sure the diaphragm is seated properly, as shown above in Figure 2. When you verify that everything is OK, tighten the top cover screws, and then the cable bracket screw. Push the carb back onto the intake manifold, first making sure that the gasket on manifold’s throat is seated nice and snug. You’re done.
All of this sounds difficult, but it’s not. After a few times messing around, you’ll be able to do this in 10 minutes flat.
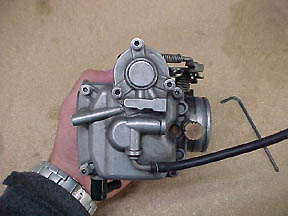
Now, a caveat. This is the perfect opportunity to replace the soft, easily stripped HD screws with a good set of allen-heads, which makes future jobs such as rejetting or modifying the needle / slide assembly much easier. Gardner-Westcott sells an set of 3mm (0.70 pitch) chrome allens, which you see above on my CV, or you can go down to the local hardware store and try your luck there. A highly recommended upgrade!

CV Underside – Rejetting is a snap with the 3mm allens and CCP Idle Mixture Adjuster

